
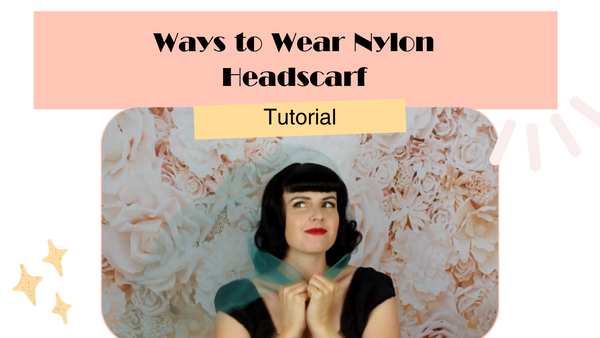
Ways to Wear a Nylon Headscarf
Ahh, the headscarf - my go to hair accessory. I just love how it adds an instant touch of retro to your look. Because you can get them in a huge range of colours, you can add a pop of colour and match your outfit.
There are so many ways to style a nylon headscarf for a pinup or vintage look, which is why I believe they are the most versatile accessory you can have in your arsenal!
Sunshine Coast Pinup School's nylon headscarfs are made from top quality 100% Japanese nylon - these are as close to the vintage thing you can get! The nylon has a dull finish and slight texture so it won't slip and slide out of your hair like other cheaper chiffon scarfs. The added bonus is that the material holds its shape, so you can create large dramatic bows.
These scarfs are square and measure in at 63 cm x 63 cm. You can also get longer rectangular ones too.
Here are my favourite 5 ways to wear a square nylon headscarf
For the next couple of styles, you are required to turn the square scarf into a rectangle shape - but why not just use a rectangle scarf? Yep just bear with me. Folding over the scarf adds more colour depth to the look, it also gives you pretty pointed ends which work great when tied in a bow. Plus, manipulating the shape of a square scarf adds that much more versatility and options to the humble accessory.
How to fold a square scarf

Firstly, this is easier to do on a flat surface, such as a table - I just do it in the air as I am usually demonstrating in front of a workshop.
- Turn your square into a triangle by folding along the diagonal
- Take the wide corner and fold into the centre
- Fold the long edge over the centre, encasing the corner within the 'tube' of scarf
The Bow

Simple, easy, classic. The bow can be used on almost any hairstyle, up or down. I generally prefer the look of a scarf behind some hair, such as a pinup roll or vintage fringe. Also works great with Bettie Bangs.
- Start with a folded rectangle shape (see above)
- Place the middle of the scarf at the nape of your neck - if using with an updo, place 2 bobby pins in a 'X' formation to keep it there securely
- Tie scarf on head in a bow
- Fluff out the bow, tuck in the ends - or style your bow however you wish
Headscarf

With a little bit of a 60s twist, you can't go past this classic headscarf look. BTW it is also amazing at hiding regrowth! This style will give you the most colour blocked look as you have the most layers of the scarf on show.
- Start with a folded rectangle shape (as above)
- Place the middle of the scarf directly in the middle of your hair
- Tie the scarf at the back at the base of your neck
- If it is long, swing the tail of the scarf so it hangs over one side
Pony Bow

Super cute way to get a bow around your pony tail whilst still having those ends and colour to peak through your hair.
- Start with a folded rectangle shape (as above) and hair in a pony tail
- Place the centre over the top of your pony tail elastic
- Wrap the scarf around the elastic and back up to the top
- Secure and tie in a bow
Necktie #1

This is such a cute and sassy way to add a pop of colour to your outfit in classic 1950s style.
- Start with a folded rectangle shape (as above)
- Holding both ends together, make a loop and hold open with your fingers
- Wrap around your neck inserting the ends in through the loop
- Position neck tie to the center or side
Necktie #2

This second necktie style gives you a more fluffier and light look, featuring the flat ends of the scarf.
- Fold square scarf in half
- Place the center of the scarf at the back on your neck
- Tie around neck and fluffy out as desired
The Rosie

Classic Rosie the Riveter style, this will encase all of your hair. Again, I like some front hair out but this style also works with no fringe detail. First you will want to start with your hair up in a french twist. As there are already more steps in this style, please refer to the full video tutorial (also below) on how I quickly chuck mine up using a frenchy Grip Tuth comb.
- Start with hair in a french twist
- Fold square scarf into triangle by folding diagonally
- Place the middle of the long side at the base of your nape - secure with 2 bobby pins in an 'X' formation
- Bring sides up and pull the back triangle forward
- Tie down on top of back triangle piece
- Flip triangle piece back and tie into a bow
- Sometimes I also like to add a bobby pin to the sides above my ears at the temple
So there you have 5 easy and classic ways to wear a nylon headscarf. Ok, maybe 6 if you count the 2 necktie styles as separate. Which one was your favourite?
Check out our range of nylon headscarfs to add that touch of retro to your look - I have the Aqua colour in these photos.
Check out the full video tutorial below:
For more pinup and vintage styling tips and tutorials, check out more from the Pinup School Blog
Renae xo
Transform Yourself Into Pinup Perfection with the Sunshine Coast Pinup School
Subscribe for more pinup and retro hair tutorials over on YouTube.
Sign up to be part of the Pinup Girl Gang email newsletter
Get my Beginners Guide to Pinup e-book:
Read more at the Pinup School Blog
Want to learn how to do your own pinup and vintage inspired hair and makeup? Check out the Online Courses on offer.